Sunday 26 February 2012

Sneek peek

Well sadly I am out of town all this coming week for work and will probably not have access to make any new posts until Friday at the best.  So here is a little something to show what Ill be posting about then.
My Wife and I also played a 1500 point game today and took alot of pictures with the intent of trying out the WWPD Batrepper.  I dont have time to set it all up tonight but will work on posting that next weekend as well.
Heres a shot of the table before deployement.
Anyway see you next week!

Wednesday 22 February 2012

Fallschirmjager! Part 2

Well yesterday I set out to base these guys in a semi-rural ruined theme.  And I totally missed the mark on that idea!  I had just started painting the brown violet base coat when I noticed a container filled with railway ballast that looked alot like perfect 15mm stones...  And had a vision!


Mooove over rubble bases!  So I started placing the stones and building the fences up just a couple or 3 rows high to simulate those stone fences that criss cross western europe.  I used super glue and based everything brown violet.  The idea being that when Im done drybrushing the stones it will have a mossy look in all the crevices.


Once the base coat was dry I started layering the stones and rubble by drybrushing starting with London Grey.  Then Stone Grey and finally a very light drybrushing of white.  The end result really worked I think.

The German Grey is the color I paint all my base edges for my Germans. The next and final step is dumping these guys in a tub full of static grass.  :)
I basically use the same method everyone else does here.  Weldbond and water mixture applied with an old brush to the base wherever I want grass.  I made sure to carefully go around my figs and also the rubble and stone details.  The stones turned out good and I didnt want to obscure them.
So here they are all finished up and defending the supply canister!  Enjoy.


Tuesday 21 February 2012

Fallschirmjager! Part 1

At our local game store (The Game shelf) we are currently taking part in an Infantry Aces campaign .  The points are set at 500 right now which basically lets you field an HQ and the 2 compulsory platoons of infantry.  Now playing Fallschirmjager and them being pretty expensive as Fearless vets means I have to take the smaller 7 stand platoons.  However I am able to take 3 mortars in the HQ!  Which is awesome.  Direct fire and bombardments without any re rolling of hits. I allocate them all to a single platoon.  Or sometimes make a Kampfgroupe with the 2IC.

The 500 points level is going pretty well for me.  So far I've been able to take home more wins that losses.  And now I find myself preparing for the increase in points to 700 in turn 2 of the Campaign.  And also looking forward to turn 3 at 900 points.

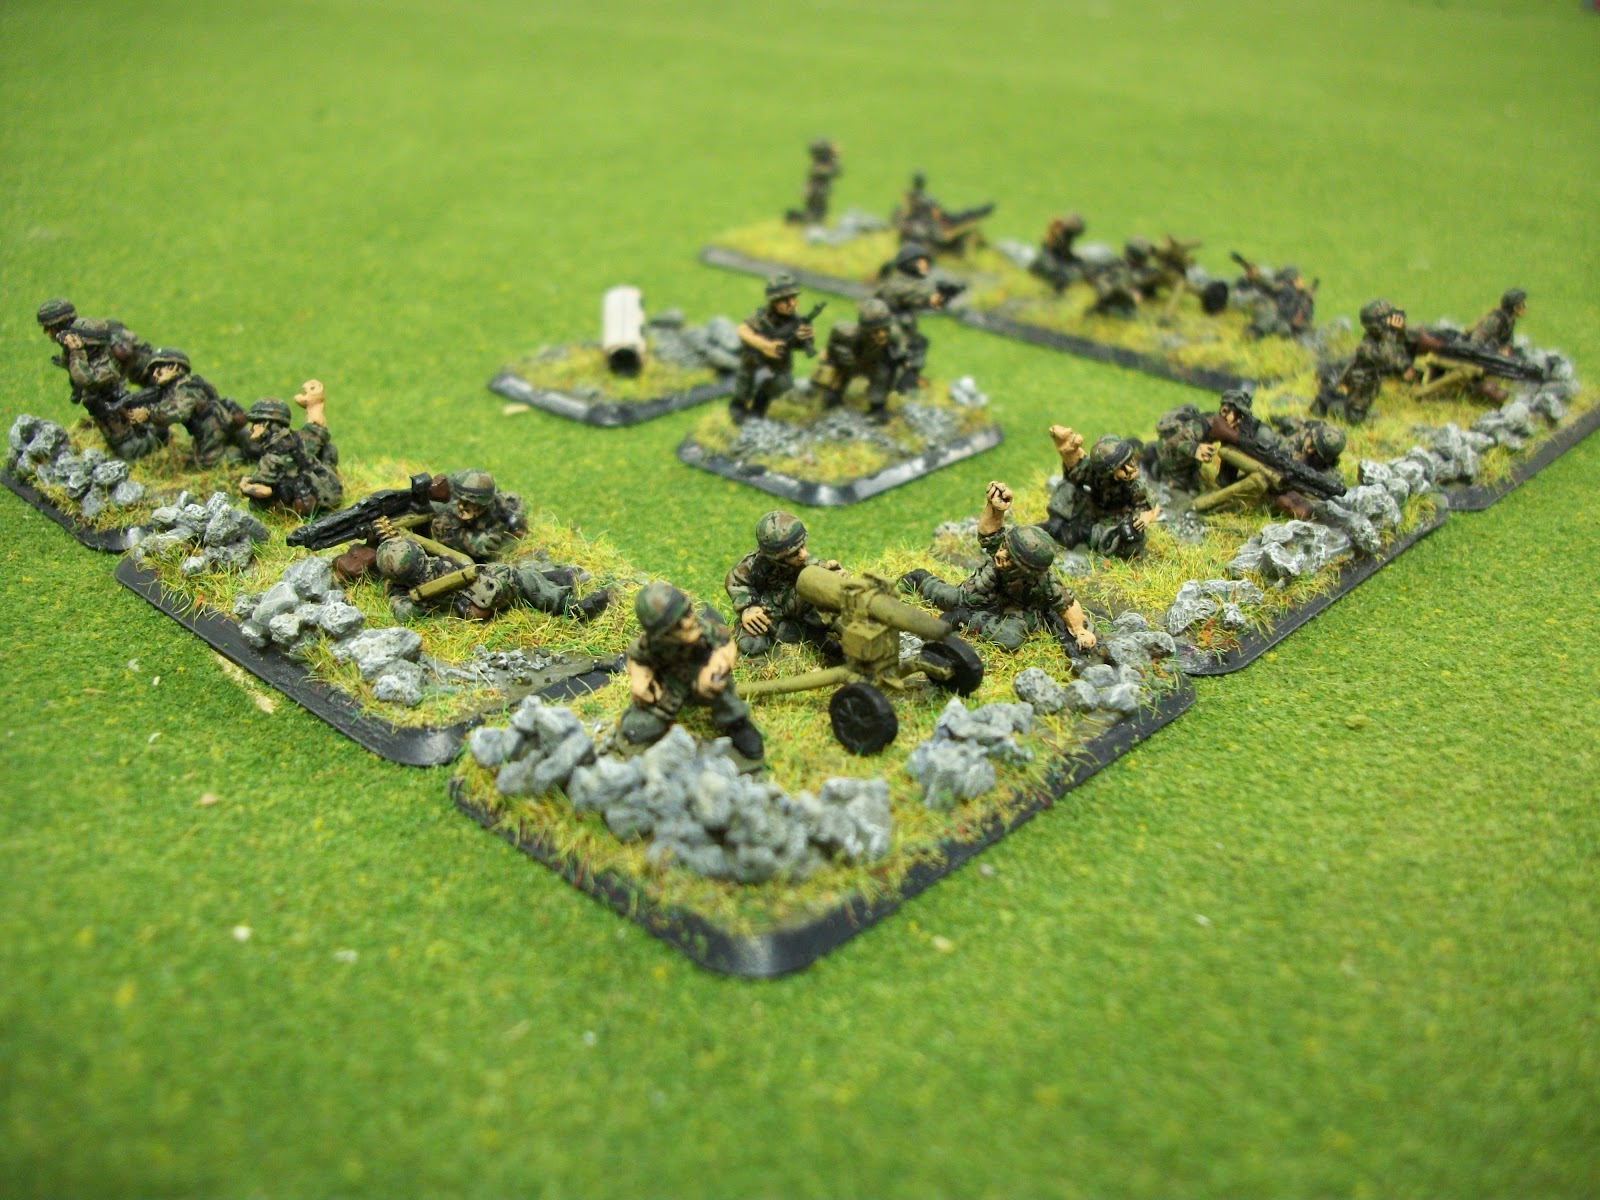
So here is what I'm working on.  A FJ Light Gun platoon at 55 points and a FJ HMG platoon 150.
HMGs simply rock now and I would most likely attach them all to my 2 infantry platoons.  Anyway heres some pics and how I based them.

Starting with the figures completely painted I glued them to their bases and used spackling compound to cover them and raise the ground level up to hide the bases of the figs.


The sculpting case is from Gale Force 9 and in hindsight I personally don't need the full set.  You can buy them in an intro sculpting set that has everything I would need.

I left the spackle to dry overnight.  The next day I decided I would base these guys in a semi-rural ruined look.  So went about getting some fine basing grit to simulate rubble and debris from blown apart walls.

One of my wife's Brit commandos in there to show what I'm working towards.  Wargames Illustrated and Cassino have some good info on how to do up Rubble bases and I apply alot of that advice when doing rubble bases.  The only reason Im not using the Battlefront rubble bases for this is because they are lots of extra work to modify for gun teams.  The BF bases are awesome for straight up standing infantry though.

I used weldbond glue and some water mixed in a blister to apply the grit.  Something I will NEVER do again. Normally I use superglue for this as it dries faster and stronger.  But it is more expensive.  However I found most of the grit rubbed right off when I tried to base coat.  And I allowed plenty of time to dry.  So back to super glue from now on!  :)


Dont forget to do this over top of something like a piece of paper or magazine so that you can pour all the excess back into your container :)

Alright I'm done for today.  Will post some updates as soon as both platoons are done.  Base coating everything with Brown Violet.

see ya soon

Saturday 18 February 2012

Bocage from the Mines Of Melia!

So I ordered up a bunch of Bocage for my Flames of War tabletop and it arrived just the other day.  It was made by one of the dudes over at WWPD (Luke)   And when I opened the box I was blown away by the quality!
M10s thrown in for good measure :P  (The Pine trees and solo trees are not part of the bocage order)
I wont go into detail on them because WWPD has a great review of their own here WWPD Bocage but I will say its construction is superb.  This all came in a box from Virgina all the way to Thunder Bay Ontario with only a spattering of loose rock.  Heres some more random pics of my Aufklarungs Lehr about to get smashed  by some ambushing M10s.

All Miniatures are BattleFront. FoW


My apologies for the Ipod pics.  A new camera is on my list of things to purchase.
PS thanks Luke :)