Monday 29 July 2013

Operation Overlord Batrep #5

The Sherwood Column races forward!

Le-Molay-Littry

For our 5th battle Sierra really wanted to get a win in Le-Molay-Littry.  She opted to attack there again even though the 2nd Panzer Div was firmly entrenched and had repelled several attempts already.

Sierra's Independent Armoured Squadron (Sherwood) Confident Vet

Overlord Page 129

HQ- 2 Shermans and ARV
2 Platoons of 3 Shermans each. 
1 Firefly platoon
Motor Platoon (CT)
Recce Platoon (51st RV) with 3 Daimlers, 2 Dingos and 3 Universal Carriers
4 25 Pounders (CT)
1500 Points

Rob's 2nd Panzer Panzerspah company (Confident Vet)

Atlantik Wall Page 122

HQ- sdkfz 250
Puma Patrol (2)
Puma Patrol (2)
Panzerspah patrol (1 sdkfz 250 and two 2cm)
7.5cm Armoured car (2)
Aufklarungs Platoon
Jagdpanzer IVs (4)
8.8 (2) with ROF 3
Panzer IVs (3)
1500 points
 

Just up ahead the 2nd Panzer Div has dug in a pair of 8.8s commanding the highway.

The objectives.  Panzer Grenadiers run to try and get into defensive positions before the Allied reserves can swoop in.

The Company Commander Escorted by a pair of Pumas following along the road.

Pumas pull onto the road to wait for the quickly approaching British column.

Here they come!  Sierra wastes no time racing up to the road.

Her Recce platoon lines up opposite the 8.8s in the Bocage.

Machine gun fire erupts from the Daimlers and Dingos spraying the 8.8s and forcing them to take cover.

Then the distant sound of artillery sounding like thunder rolls in! 

This time the 8.8s are not so lucky.  One explodes as the ammunition pile is hit!

German Armoured reserves arrive turn 1!

They move up planning to get into a covering position on one of the Objectives but stumble across a patrol of Universal carriers!

Who disengage back to the main column safely.

he Tank hunters are clear to contest the M10 objective and move to wait for the Allied reinforcements.

The Grenadiers are also moving into position on the other objective.  Both objectives are well protected now.


The Brits continue to  lay heavy fire from the Daimlers and Artillery on the remaining 8.8.

3 of the tank hunters make it to concealed positions on the objective.  1 bogs on the bocage and would remain bogged there for the majority of the encounter.


Pumas and the CO spot some Motor platoon MG teams and arty observers trying to sneak behind the bocage and lay down some MG fire pinning them and sending a team to the maker.

The remaining 8.8 scores a Daimler kill!

The universal carriers pop onto the road and fire a Piat at the Pumas bailing one.

Return fire is effective taking out 2 of 3. 

The Daimlers and the Artillery obliterate the last 8.8 clearing the road.

The last surviving Universal carrier fails its morale check and spontaneously combusts

Aerial view of the bocage country.

After mopping up the 8.8s the Daimlers move up to try and sneak some shots at the Pumas or the Grenadiers on the other side of the bocage.

The Grens are all dug in and waiting for....

Ahhh crap..  Thats alot of Fireflys and Shermans.  The Brits roll reserves and get 2  platoons. 

Not to worry.  The Tank hunters are Vets, Concealed, gone to ground and the fireflys are on the move.

Personal morale just walked out and slammed the door.  Sierra rolls 3 sixes and then 3 fFP checks!  The only survivor is the bogged guy on the bocage lol

Luckily the rest of the German reserves arrive.  But is it too late?

The Panzer IVs plan on crossing the bocage while the Pumas go to try and scare off the Daimlers just up the road.

Shermans advance on the dug in Grens.  Machine guns blazing.

Absolute chaos as around every corner is a sherman or a puma.


Turns out the fireflys had some more tricks up their sleeves and waste a couple panzer IVs.  The lone tank hunter watches on in horror still bogged.

Remaining Panzer IV backs away from the Fireflys behind the bocage to join the Pumas in smiting some Daimlers.  The objective is pretty much lost at this point with only the Grens to contest.  Its now about killing as many platoons as possible.

Semi indirect fire is evil.  That is all.  Can you see Sierra's CO and 2IC off in the distance in their Shermans?


SWEET REVENGE!  DIE Daimler scum!

The Grens manage to bail out a Sherman with a Panzer faust and decide to assault.  Somehow the Brits are suprised and cant stop them in defensive fire.  After Sacking the Shermans the Grens return to their foxholes.

A valiant effort by the Germans but its just not enough.  Time was getting on and the slugfest could have gone on several more turns.  The Germans having lost 90% of all armor from every platoon retreat.  The Grenadiers surrendered and were taken prisoner.  The war was over for them.

4-3 minor victory for the Allies

Monday 22 July 2013

Operation Overlord Batrep #4

Le-Molay-Littry

The Attackers

Sierra's British 6th Airborne parachute co. (1500) Overlord pg 23

HQ with 3 Piats
2 Full Strength Paratrooper Platoons and 1 Sniper
Airborne Armoured recce platoon with 3 Tetrarchs
Airlanding Anti tank Platoon with 4 6PDRs
Battery of 8 25PDR Arty
Limited Tyhoons

Kieths 11th Armoured Recce Squadron (1495) Overlord pg 83

HQ with 2 Cromwell IV and 2 CS with a ARV
2 platoons of 3 Cromwells each
Recce Stuarts x3
M10s X4
Rifle Platoon with Piat, Light mortar
Battery of 8 25PDRs

Defenders

Rob's 2nd Panzer Div. Fortified Panzergrenadier Kompanie (1500) Atlantik wall

HQ  SMG/Fausts and Schreck
2 full strength Panzergren platoons with Trucks
4 Minefields and 2 MG nests
sdkfz 10/5 AA x3
Puma Patrol with 2 Pumas
2nd Puma Patrol with 2 Pumas
Panzer platoon with 3 Panzer IVH
15cm Nebs x3
8.8 with ROF 3.  1 Gun

Daniel's Schwere SS Panzer Kompanie (1500)

HQ Tiger (ROF3 and For The Fatherland)
2 Tigers
2 Tigers
3 SdKfz 7/1
SS Panzer Pioneers with 2 Squads in Halftracks

For this battle we decided to try something a bit different and used the Total Victory Mission from Normandy Battles book by Battlefront.  One of the main reasons was that we could set a time to end and just tally up the points to find the winner.  For the game we used two tables.
 
 
This is the view from the Defenders side.  Plenty of Bocage and roads.   A nice village with a Cathedral.  Sierra and Keiths combined 16 gun battery of 25 pounders in the distance!  Each side starts the game holding 2 Objectives in their own deployement area.  There are 2 more in the center up for grabs. 

 Sierra deploys only half her force on the table.  All her Paratroopers and Tetrarchs are in reserve and as per the Total war rules can arrive on either their own side or behind the enemy!
I found a beautiful spot for my 88!  Covering an objective along a road with Grenadier support.

 Turn 1 was pretty much alot of Advancing for the Allies.  No Reserves arrive.  However Sierra swooped in and tried to take out the German AA.  It didnt go well for the Typhoons... 
 On the German turn Rob gets a platoon of reserves and elects to bring on a Puma patrol in Sierra's Artillery park.  This would be like shooting ducks in a barrel!
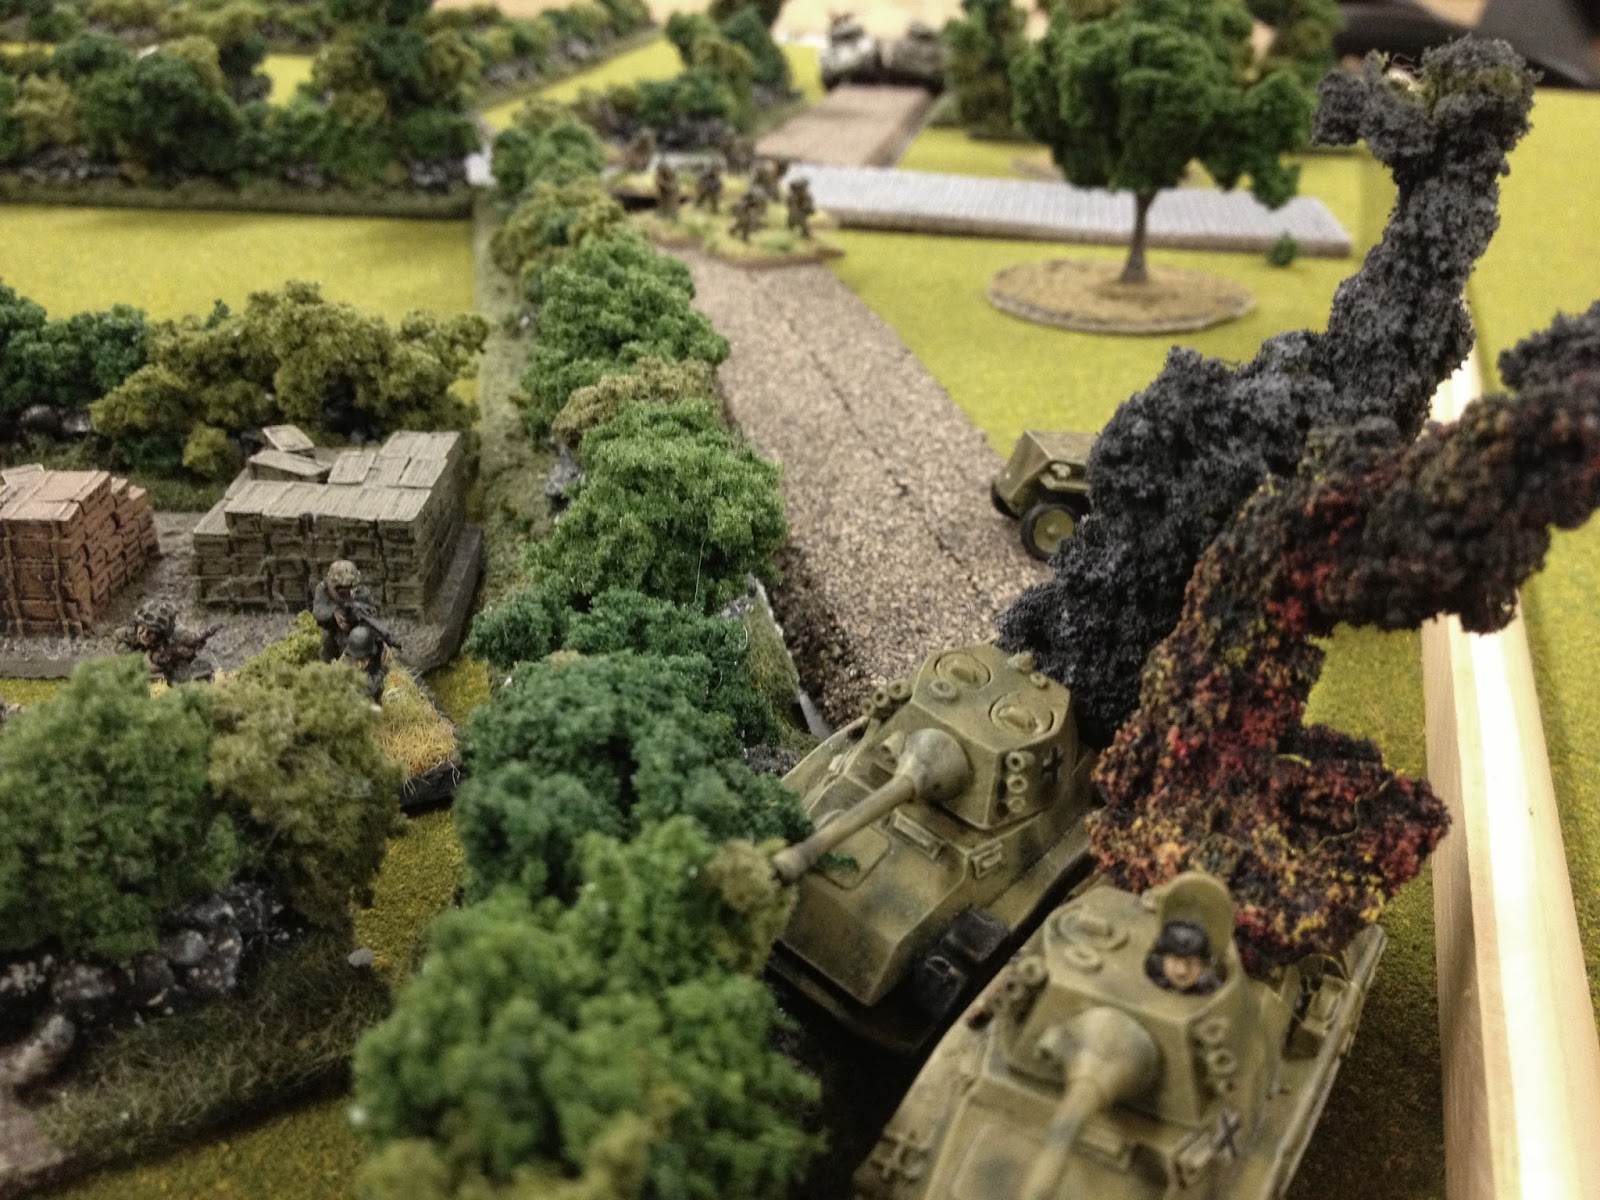
 15cm Nebs open up on some M10s in the open
Popping one and bailing another as they try to cross the train tracks headed to one of the center objectives.

 Keith trys to get his Stuarts around the flank but Daniels Tigers dont agree to that and make quick work of them at long range.
 Sierra's 25 pounders turn 180 and open up on the sneaking pumas!
DOH!  forgot about the turntables!  Runaway Runaway!
 Robs Panzer IVs and the 2nd Puma Patrol which had just arrived from reserves make for an un contested objective in the center. 
 Keith gets over the tracks with his M10s though and manages to snag it first!
 Nearby his Cromwells are not faring as well.  A minefield blocks their path and the only way around is through bocage or over train tracks.  Luckily my 2IC with his Faust is just out of range!
Pumas decide to try and thin their numbers.
The Germans manage to hold a 3rd onbjective for 2 turns giving them a comfortable 2 point lead.
 But the tide begins to turn and Sierra finally gets her reserves!  Here they come charging towards the German rear.  All that stands between them and capturing an objective is an MG nest and a pair of 10/5s.  Under cover of a smoke barrage as well as several HE bombardments the Paras surge forward.  The 10/5s are destroyed by Artillery and rifle fire. 
 Pumas race back to try and help the lone MG nest but smoke and the Bocage keep them from making a difference.
The MG and the Pumas manage to gut the Paras who are now in assault range.  They unpin and rally to the Assault.  At the same time Tetrarch arrive from reserve to back them up.

They storm the MG nest and take it out,  down to only 3 stands the Paratroopers with the Tetrarchs hold the objective and stay on!  
 Meanwhile behind the 15cm Nebs Sierra's other Para platoon has charged up from behind and begins slaughtering the poor gun teams
 The Panzer Grenadiers farther up and too far away to help can only listen to the screams of their comrades over the radio.
The Horror
 Firmly in control of a 4th objective
 During the bloody assaults Keith and Rob had a good tank slug fest for another objective.  The Germans came out on top but the only Panzer IV to survive was Bailed out and couldnt get the point for the objective!
This meant that the Germans didnt collect any points on the final turn.  Bringing the Allies up 2 points and Tieing the match! 

DRAW
It really looked like the Germans were dominating early on.  I think we needed to push harder though.  We had a Panzer grenadier platoon that just sat in a forest and was a complete waste.  Likewise the Allies also had a Platoon of infantry that played no part.  The Airborne and Recce platoons being able to arrive from either table edge was the game changer.  Sierra had very little to do most of the game except drop 8 gun bombardments on everything.  But once those Paras arrived it was a blood bath.